Your business information appears on all your invoices and quotes. Setting it up properly ensures your documents look professional and include all the details your clients need.
- 1
Go to Settings
Click Settings in the left sidebar. You'll land on the Business tab by default.
- 2
Fill in your business details
Enter:- Business Name — appears at the top of your invoices
- Email — your business contact email
- Phone — optional
- Website — optional

- 3
Add your address
Scroll down to fill in your business address. This appears on invoices below your business name.
- 4
Upload your logo
Click the logo upload area and select an image from your device. Your logo will appear in the top-left corner of all your invoices and quotes.
Use a PNG or JPG, ideally square or landscape shaped. A minimum width of 200px is recommended for crisp printing.
- 5
Set your VAT status
If your business is VAT-registered, enter your VAT registration number in the VAT Number field. This adds VAT columns and calculations to all your invoices.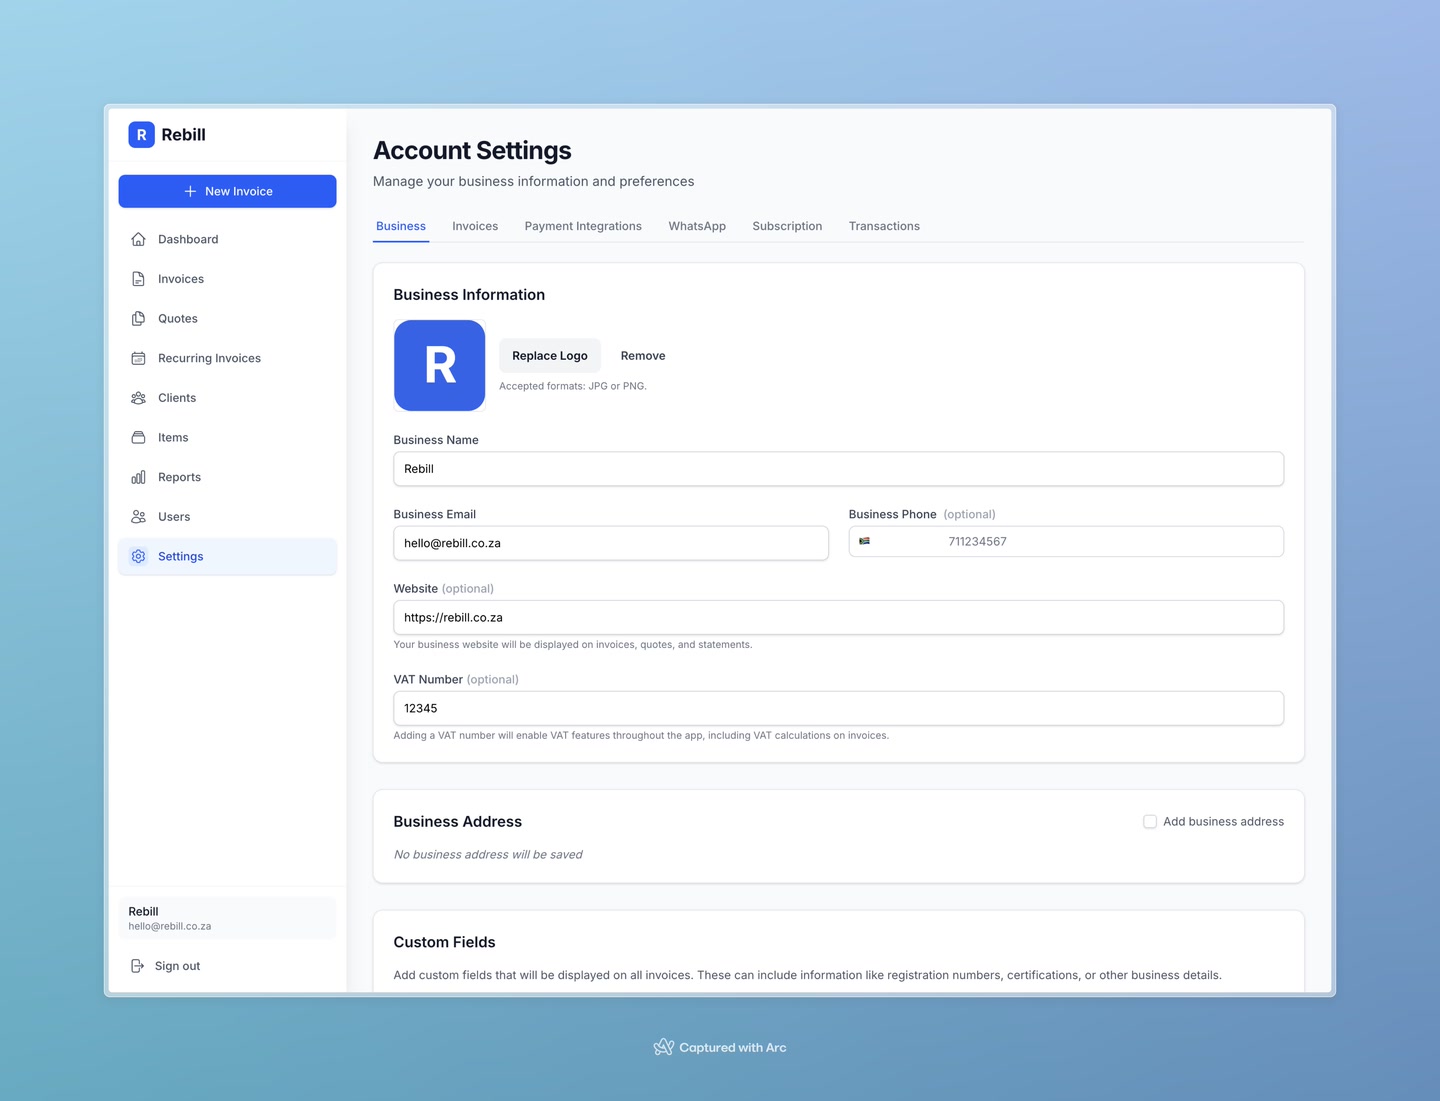
- 6
Save your changes
Click "Save Settings" at the bottom of the form.
Note
Any changes you make to your business information will appear on future invoices. Existing invoices already sent are not affected.