Creating an invoice in Rebill takes just a few steps. You'll pick your client, add what you're charging for, and either save it as a draft or send it straight away.
- 1
Click "Add Invoice"
Go to Invoices and click "Add Invoice" at the top right of the page.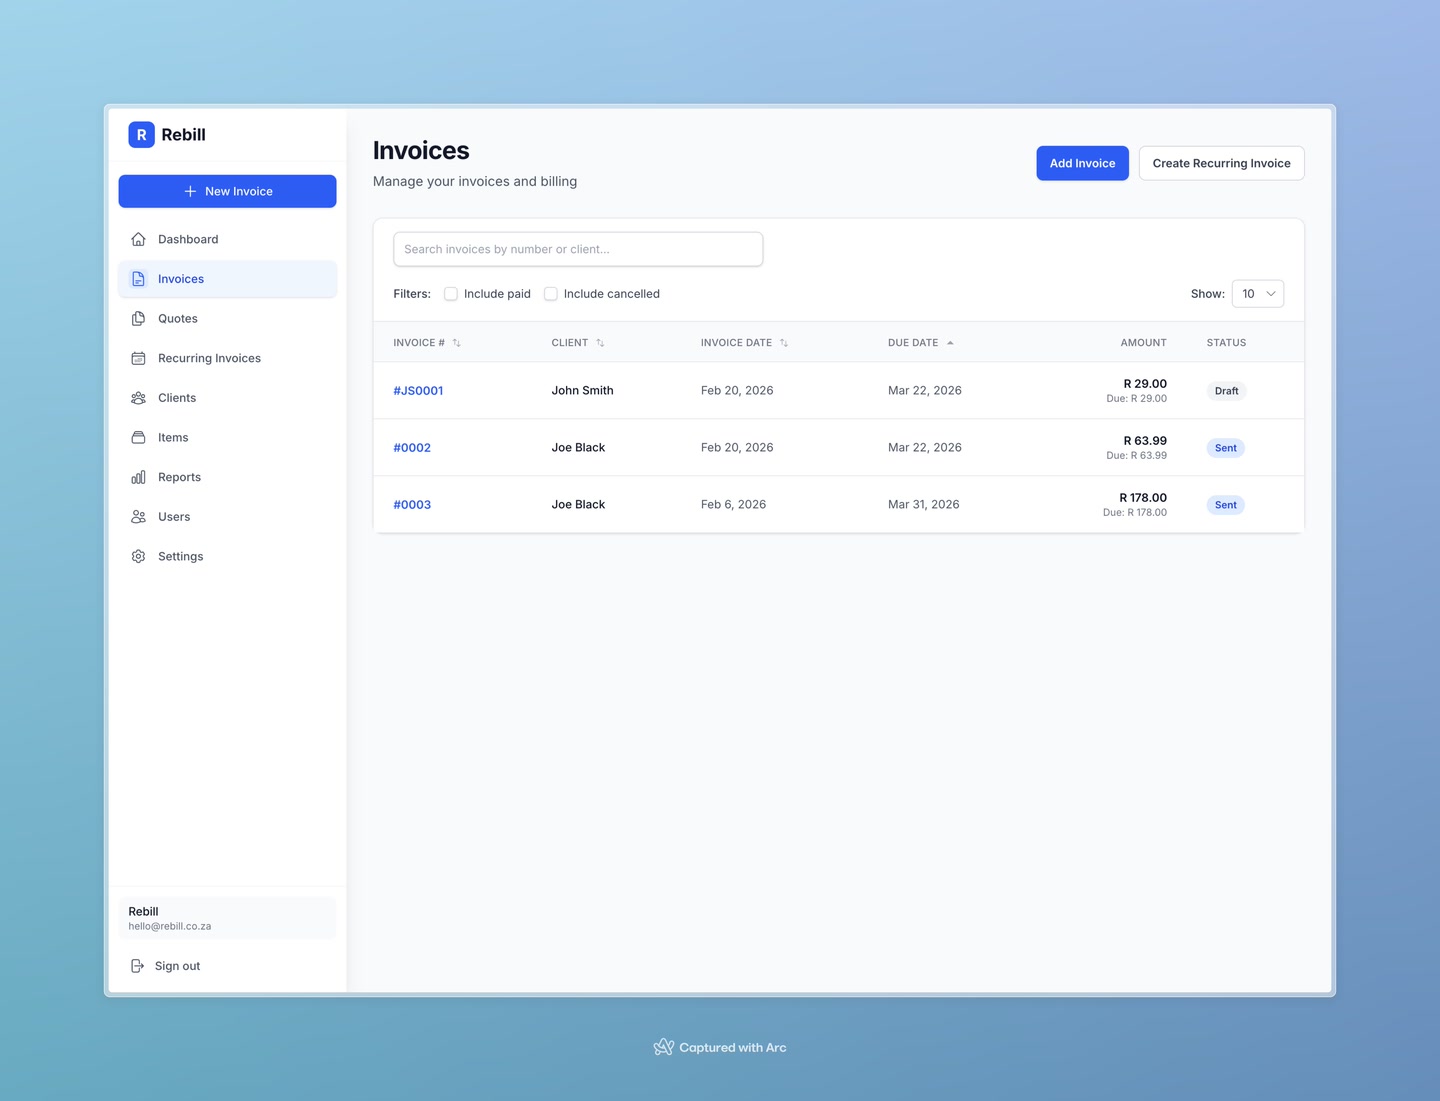
- 2
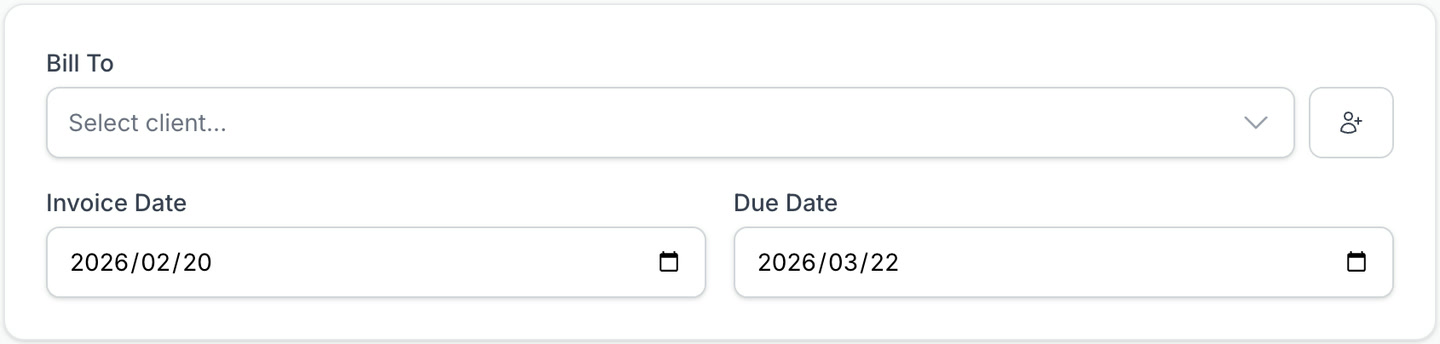
Select your client
Start typing the name of the client you want to invoice in the Client field. A dropdown will appear — click on the correct client to select them.
If the client doesn't exist yet, you can add them quickly without leaving the invoice form.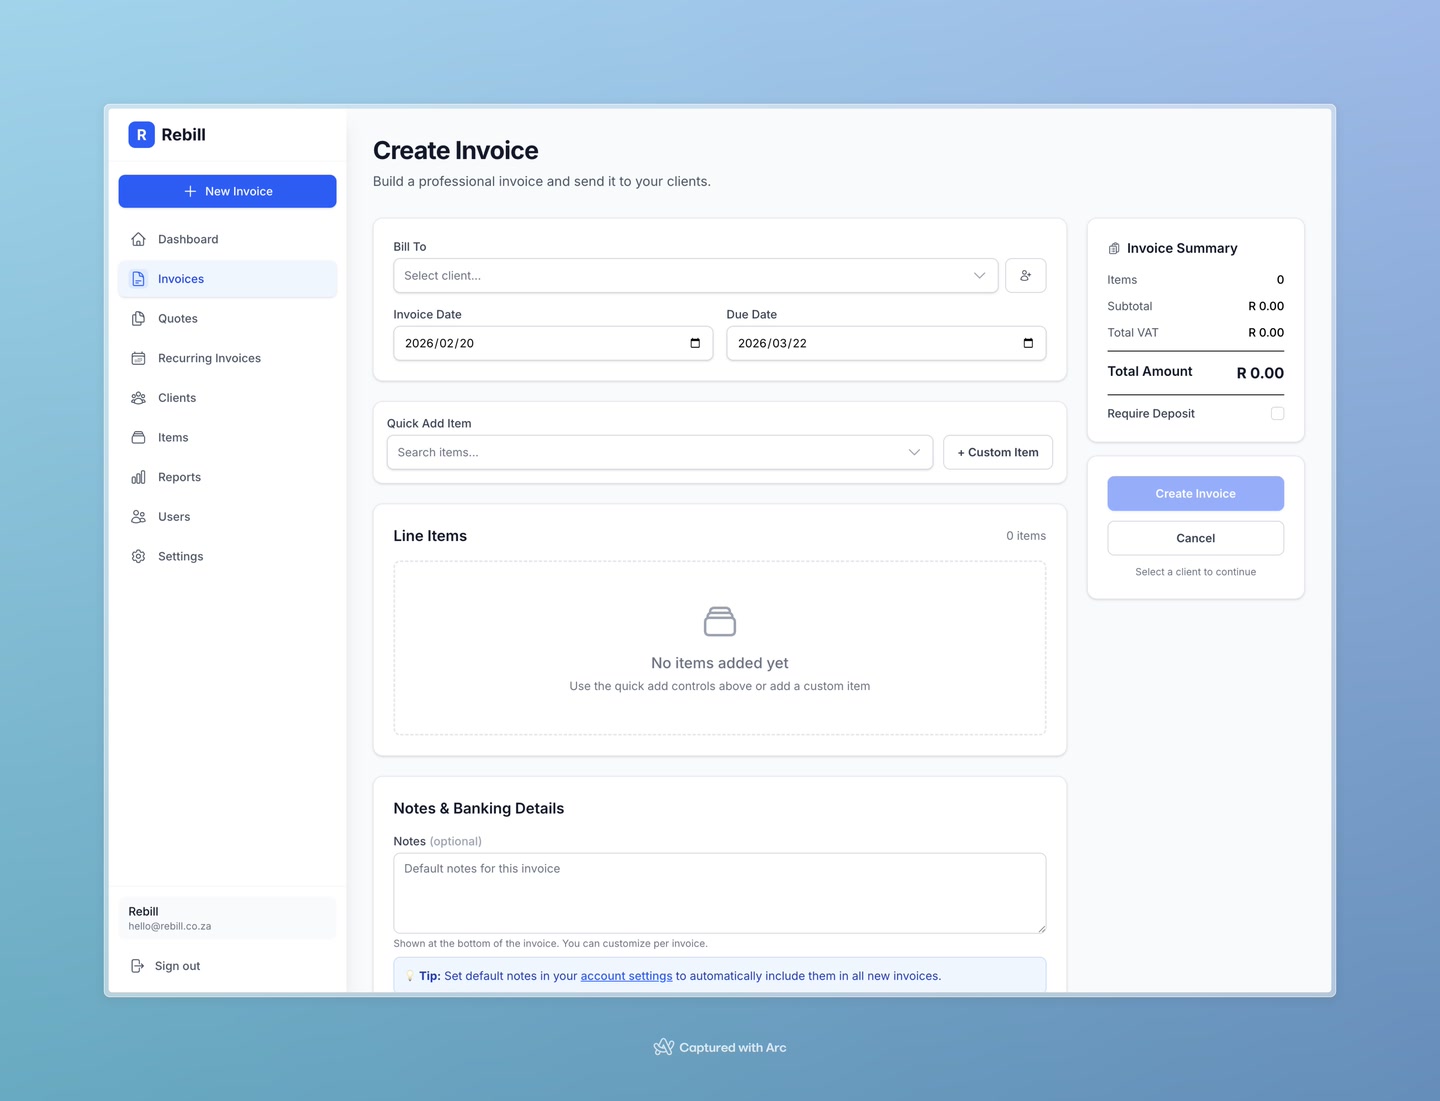
- 3
Set the invoice date and due date
- Invoice Date — usually today's date (filled in automatically)
- Due Date — when you expect to be paid (e.g. 30 days from today)
- 4
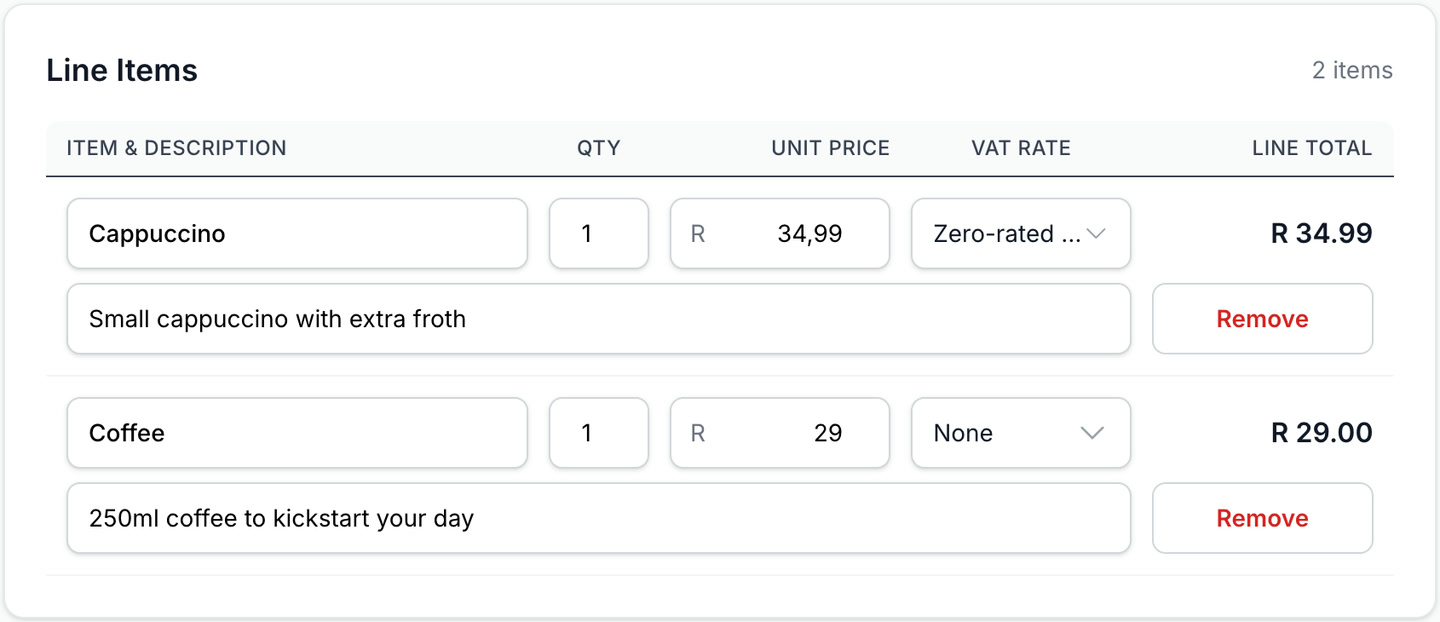
Add your line items
Each line item is something you're charging for. Click "Add Line Item" and fill in:- Description — what the item or service is
- Quantity — how many units (e.g. 1, 5, 0.5 for half an hour)
- Unit Price — the price per unit
- 5
Add notes or bank details (optional)
- Notes — any message for your client, like payment terms or a thank-you message
- Bank Details — shown on the invoice if you want clients to pay by EFT. These default to what you've set in Settings.
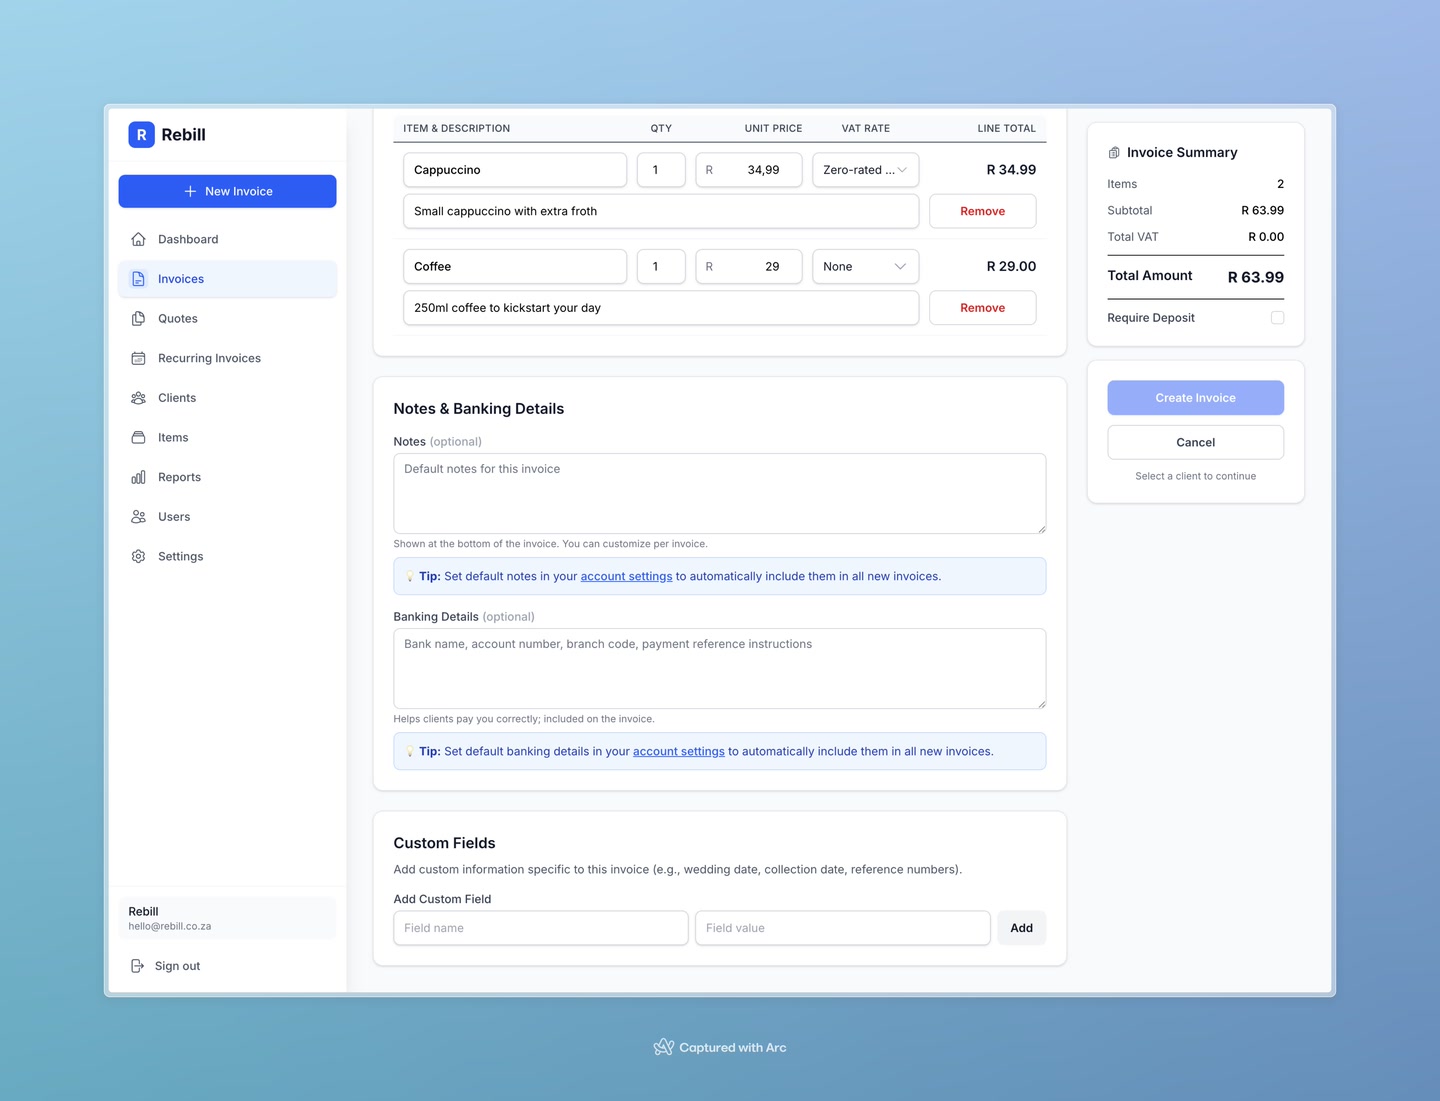
- 6
Create the invoice
When you're done, click "Create Invoice" to save it. The invoice will be created as a draft — you can then send it to your client from the invoice page.
Use saved items to save time
If you regularly charge for the same things, add them to your Items catalog first. Then when adding a line item, just search by name and the description and price will fill in automatically.VAT-registered businesses
If your account is set as VAT-registered (in Settings), you'll also see a VAT Type column on each line item. You can set each item as Standard (15%), Zero-rated, or Exempt. The VAT totals are calculated and shown at the bottom of the invoice.